Here are some helpful tips to assist you in selecting a Roofing Contractor in or around the Dayton, Ohio area.
tip #1
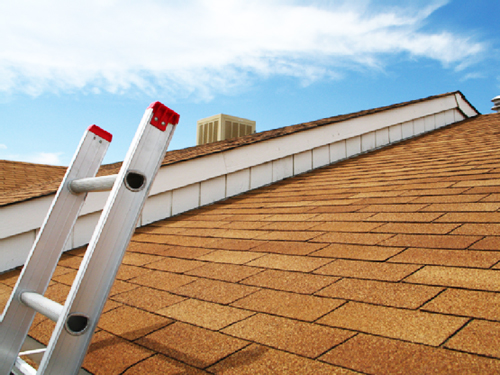
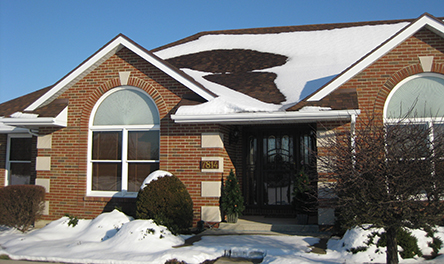
GETTING READY FOR WINTER
- Check all gutters and make sure they’re clean. You may want to consider a gutter guard or leaf covers. This will help keep ice from building up inside the gutter. The extra weight can tear them down.
- Make sure your gutters are securely fastened.
- If you have a flat roof with roof drains, make sure the drains are functioning.
- Check the mortar and brick on your chimneys and call a mason to make any repairs.
- Check all flashings. Flashings are the metal pieces used to waterproof interruptions in the roof plane such as pipes, chimneys, skylights, etc. If you suspect a deficiency and are unsure about how to fix it, call a roofing contractor. Snow leaks can wreak havoc on a house’s interior during the winter – spending a nickel now can save a dime later, as the adage says.
- Check all areas of caulking. Touch up any suspected deficiencies.
- Don’t use a snow-blower on your roof. Snow blowers are dangerous and can also tear up the roof.
- If you get up on the roof to remove snow with a shovel or similar tool, be careful that you don’t damage the roofing materials.
- NEVER use an ice pick to remove ice build up.
- Yes, heat tape works but be careful and buy a high quality product. Heat tapes have been known to catch fire and burn down houses. Also be careful about how you install it. You don’t want to poke a bunch of holes in your roof.
tip #2
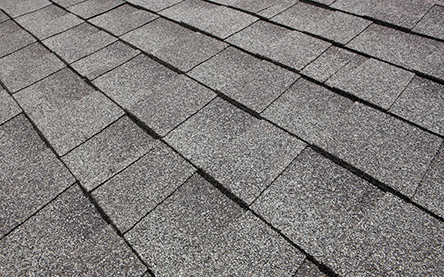
ASPHALT SHINGLES
-
- NEVER USE STAPLES! A really good type of nail to use in roofing applications is a “Hot-Dipped Galvanized” nail. This type of nail is dipped in a bath of molten zinc. Do not confuse these nails with “Hot Galvanized (H.G.)” nails which are coated by tumbling them in a mixture of zinc chips inside a hot furnace. A couple of types of nails that aren’t recommended are “Electroplated” (A.K.A. Electrogalvanized or E.G.) and “Mechanically-Plated” (A.K.A. Peen-plated or golden-galvanized). These two types rust quickly when exposed to weather and moisture.
- Nails should be long enough to penetrate the wood decking a minimum of 3/4″. A general rule of thumb is to use 1-¼” nails in reroof applications when the old roof is torn off and to use 1-½” nails when overlaying the old roof.
- Use a minimum of four (4) nails per shingle, or six (6) nails per shingle in high wind areas and six (6) nails per shingle on slopes exceeding 12/12, or 12 inches of rise for every 12 inches of vertical “run” (a 45 degree angle).
- When replacing decking material, it is recommended that it be replaced with half sheets (4’x4′). You want the decking to span 3 rafters. A 4’x4′ sheet will span 3 rafters spaced 24 inches apart. Do not “piece” in decking.
- Use a dense nailing pattern for installing the underlayment. That way, if the shingles blow off, then the felt should still be there to help provide protection.
- When placing decking over rafters set on twenty-four inch (24″) centers, it is recommended that minimum 7/16″ decking be used.
- Ice and water protection membranes should be installed in regions where the average January temperature is below freezing (32° F, 0° C). The membrane should extend from the bottom edge of the roof, past the interior wall line a minimum of twelve inches (12″).
- It is always a good idea to place an ice and water protection membrane in all valleys and eaves.
- For Starter shingles, you can use 3-tab, self-sealing shingles with the tabs cut off.
- Always nail shingles ON THE NAIL LINE.
- Galvanized edge metal (drip edge, nosing, etc.) should be rubbed with white vinegar or diluted muriatic acid (HCl) prior to priming and painting.
- Paint your roof penetrations and flashings the same color as your fascia to improve aesthetics.
- Do not install ventilation devices halfway up your roof. Install them at the very top. Installing roof vents between the intake and exhaust vents will cause a ventilation short circuit.
- For proper ventilation, you should have an under-eave soffit ventilation and ridge ventilation installed at an area ratio of 1/1. In other words, for every square inch of soffit ventilation you should have a square inch of ridge ventilation.
- All raggles should be a minimum of 1″ deep.
- If installing gutter, try to use straps instead of nails and furrels. Nails can pull out of the fascia if your gutter fills up due to plugged downspouts.
- Never install wood decking directly over wood decking. Wood decking needs to be able to “breathe” on one side or else severe warping can occur.
- Install the drip edge material over the underlayment along the rakes and under the underlayment along the eaves.
- Keep all oils, greases, and chemicals off of the roof.
- The nails you use to install your hip and ridge cap should be approximately 1/2″ longer than the nails used on the main sections of the building. This is because the hip/ridge nails generally have at least two extra layers of material to go through.
SPECIAL CONSIDERATIONS FOR OVERLAYS (RE-COVER)
- Remove any curled shingle tabs. You want the substrate of the new roof to be flat. Use a flat nosed shovel as it works the best.
- Don’t overlay a roof with algae problems unless you clean it first.
- Before you start, cut the existing shingles back approximately ½” to 1″ from the edge of the roof all the way around. If you install new drip edge, make sure that it covers the old drip edge material or else it will look ugly. Install a starter row along the eaves.
- When overlaying an existing shingle roof, DO NOT install a layer of felt between the systems.
- Tear off the hip and ridge cap before you start or else it will cause a large hump in the roof along the hips and ridges.
- Nails should be long enough to penetrate the deck a minimum of ¾”. 1 ¼” to 1 ½” nails are generally used in overlay applications.
- The nails you use to install your hip and ridge cap should be approximately 1/2″ longer than the nails used on the main sections of the building. This is because the hip/ridge nails generally have at least two extra layers of material to go through.
- Install all new flashings. Remove the old flashings and fill in the void that it causes with shingle material.
- Use four (4) nails per shingle minimum, six (6) nails per shingle in high wind areas.
- Check with your local building department prior to overlaying the existing roof. Some cities/regions allow only two layers of roofing while others allow three layers.
tip #3
ROOF LEAKS
There can be many reasons for a leak. Leaks can be the result of poor roof system installation, mechanical damage such as dropped screwdrivers or knives, plugged roof drains, roofing material failure, HVAC problems; the list goes on. The source of a leak can be quite distant from where it actually shows up.
Chasing a leak isn’t always as easy as it would appear to be. When trying to locate a leak, use the following guidelines to assist you. NOTE: whenever you see the words “the leak area,” it refers to an area within a 10 foot (3 meter) diameter of the leak.
If you are calling a contractor to take care of your leaks. Here are some questions that he may want to ask you.
QUESTIONS:
Has anyone been on your roof doing work? An electrical contractor, HVAC mechanic, someone installing a heat pump or evaporative unit? And if so, were they anywhere near the leak area?
Does it leak only when there’s a wind-driven rain? Only when it snows?
How long after precipitation starts does the leaking begin? How long after the precipitation quits does the leak quit?
Has anyone been up in your attic recently?
The most important ingredient to a good roof is proper installation. The best roofing materials in the world are worthless if they are installed incorrectly. Be very careful when choosing a roofing contractor in the Dayton, OH area!